The latest VMware NSX (4.0.1.1) implements a multi-tenancy model that supports various tenants operating a single NSX platform. This enables them to provision isolated logical networking and security topologies using a shared infrastructure.
Currently, this functionality is supported only through APIs. All configurations are displayed as read-only in the NSX UI. Let’s hope this fantastic feature will soon be fully available from the UI. 😉
Note: All JSON files used in the blog are available from my GitHub repo:
https://github.com/nnikodimov/nsx-multi-tenancy
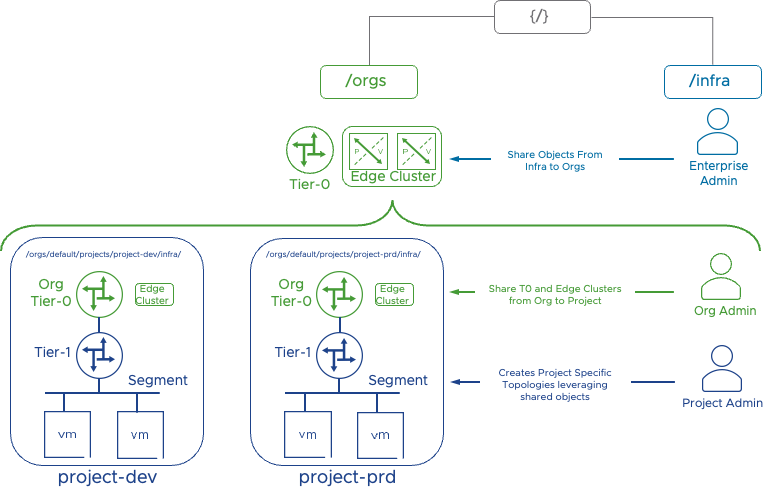
Conceptual model
The model has a two-level hierarchy that introduces the concepts of Orgs and Projects. Single default Org is available in 4.0.1.1. Two new user roles are also introduced: Org Admin and Project Admin.
The VMware documentation states that in version 4.0.1.1, the Org Admin role is available in tech preview mode to manage Projects within the Org, and this role does not have access to the /infra objects that are required to create Projects. Because of that, an Enterprise Admin role is required to create Projects.
Nevertheless, if the Enterprise Admin shares Tier-0 Gateway and an Edge Cluster from the /infra three, the Org Admin can create Projects. The Org Admin is also responsible for providing the necessary role bindings between Project Admins and their respective Projects.
The Project Admin then can manage the respective Project having full access to configure resources like Tier-1 Gateway, Segments, Security Groups, and Rules within that Project.
Org Admin role binding
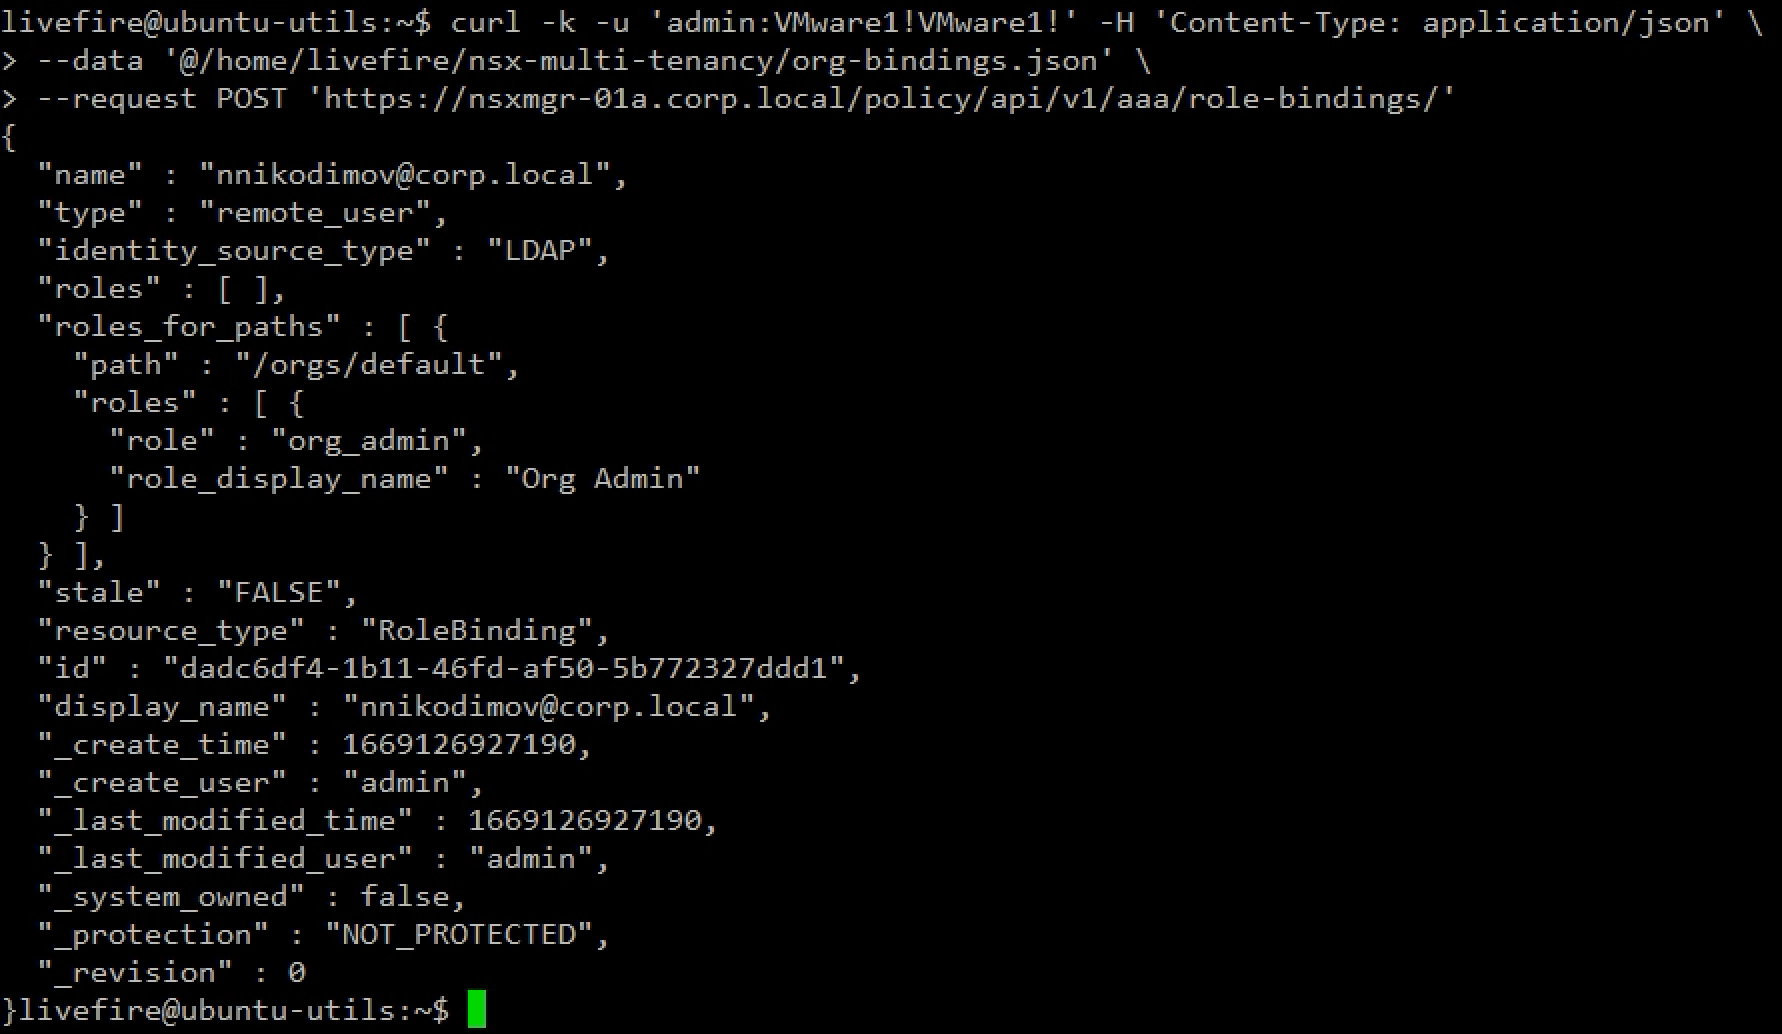
In my test environment, I have LDAP configured as an Authentication Provider. I will use my AD account to configure Org Admin and role binging …how modest 😀. Below is the JSON body and API call.
livefire@ubuntu-utils:~$ cat nsx-multi-tenancy/org-bindings.json
{
    "name":"[email protected]",
    "type": "remote_user",
    "roles_for_paths": [
        {
            "path": "/orgs/default",
            "roles": [
                {
                    "role": "org_admin"
                }
            ]
        }
    ],
    "resource_type": "RoleBinding",
    "identity_source_type": "LDAP",
    "read_roles_for_paths": true
}
The API call creates the user with an Org Admin Role.
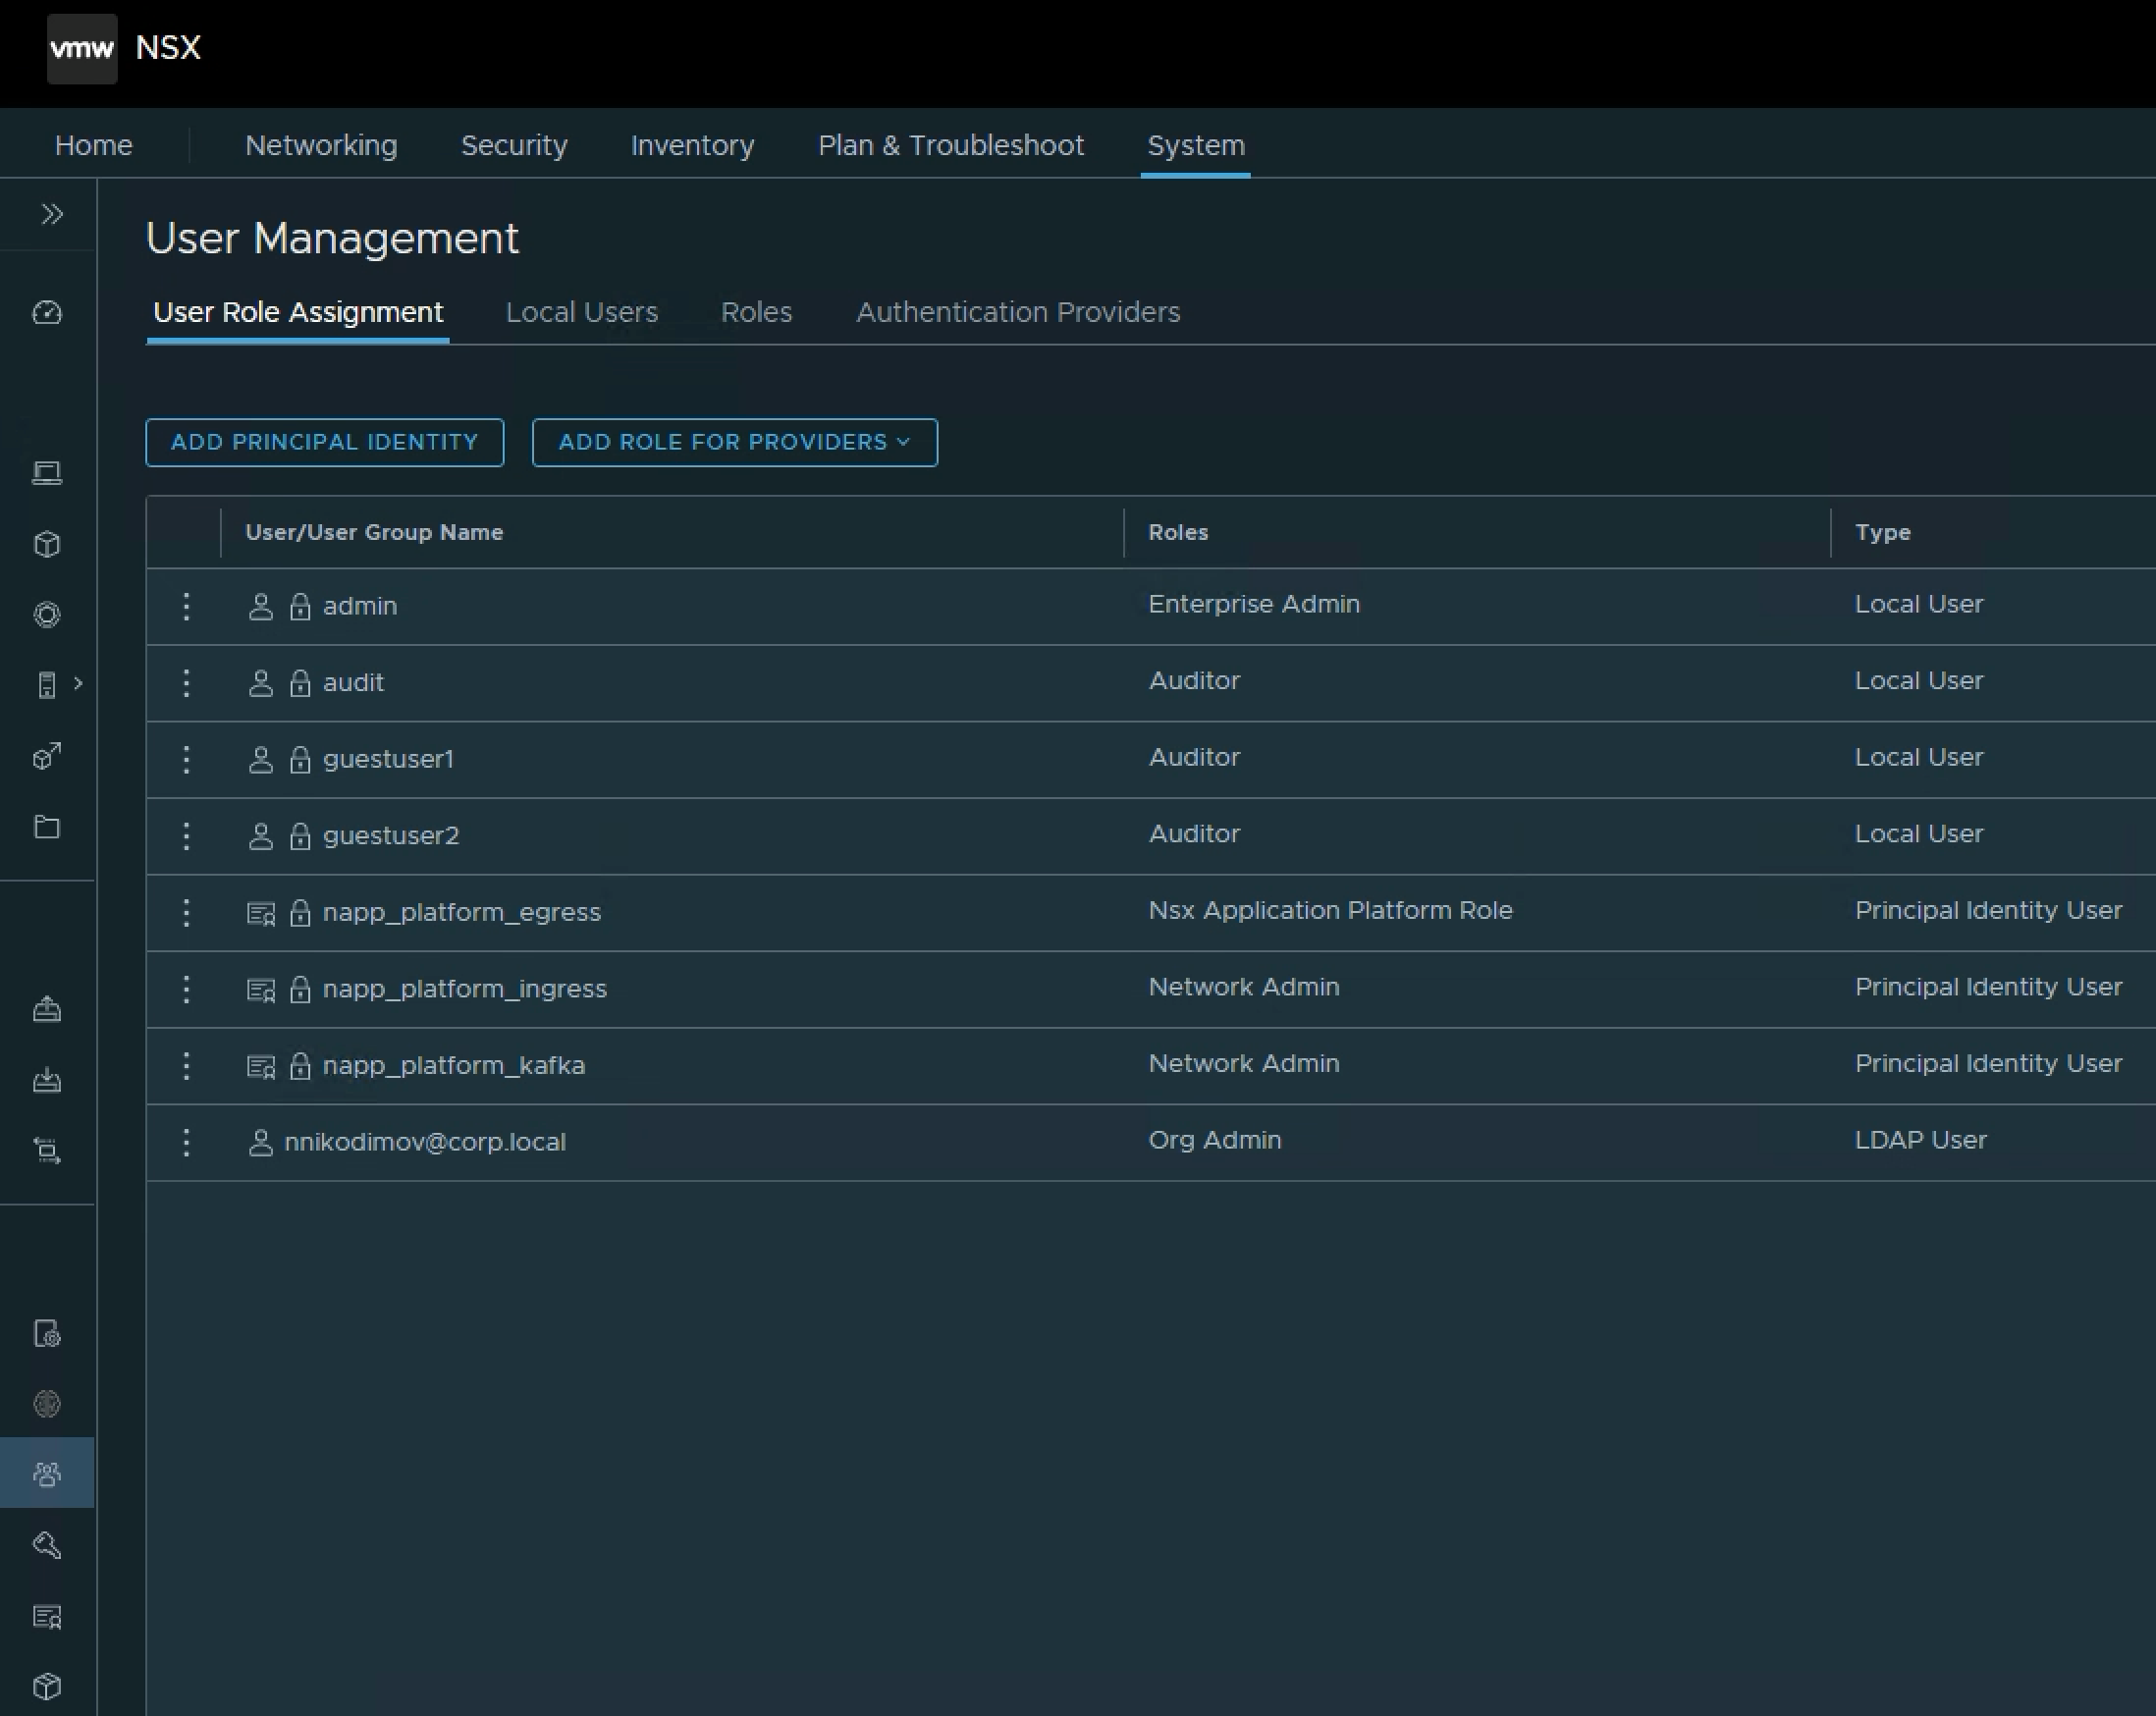
Navigating to the NSX Manager UI: System > User Management, we see the new User created. This User cannot be modified from the UI.
Resource Sharing
The default Org is created during the NSX deployment and cannot be modified. The Org represents a collection of shared resources that can be consumed by the Projects belonging to the Org. The Enterprise Admin has to share /infra space resources with the default Org.
As I mentioned earlier, before the Org Admin is able to create Projects, the Enterprise Admin has to share at least a Tier-0 Gateway and the respective Edge Cluster with the /orgs/default, which holds the multi-tenancy constructs. Let’s do that using the below JSON body and API call.
The Edge Cluster allocated to the Project must belong to the default transport zone, and this transport zone is where the Project networks are created.
livefire@ubuntu-utils:~$ cat nsx-multi-tenancy/share-resources.json
{
    "display_name": "org-t0-gateway",
        "resource_objects": [
        {
            "resource_path": "/infra/sites/default/enforcement-points/default/edge-clusters/46d44a29-38cd-4495-ac83-a144c142fe00",
            "include_children": false
        },

        {
            "resource_path": "/infra/tier-0s/t0-gateway",
            "include_children": false
        }
    ]
}
Projects Creation
Now the Org Admin should be able to create Projects. Let’s create two projects: Development and Production.
Creating a Tier-0 Gateway and Edge Cluster is not supported under Project, and they have to be shared from the /infra three. Then we have to specify the shared Tier-0 Gateway and Edge Cluster in the JSON body for the Project creation API call.
livefire@ubuntu-utils:~$ cat nsx-multi-tenancy/project.json
{
    "site_infos": [
        {
            "edge_cluster_paths": [
                "/infra/sites/default/enforcement-points/default/edge-clusters/46d44a29-38cd-4495-ac83-a144c142fe00"
            ],
            "site_path": "/infra/sites/default"
        }
    ],
    "tier_0s": [
        "/infra/tier-0s/t0-gateway"
    ]
}
As the Tier-0 Gateway and Edge Cluster are the only resources we currently share, we can use the same JSON body when creating the Development and Production Projects.

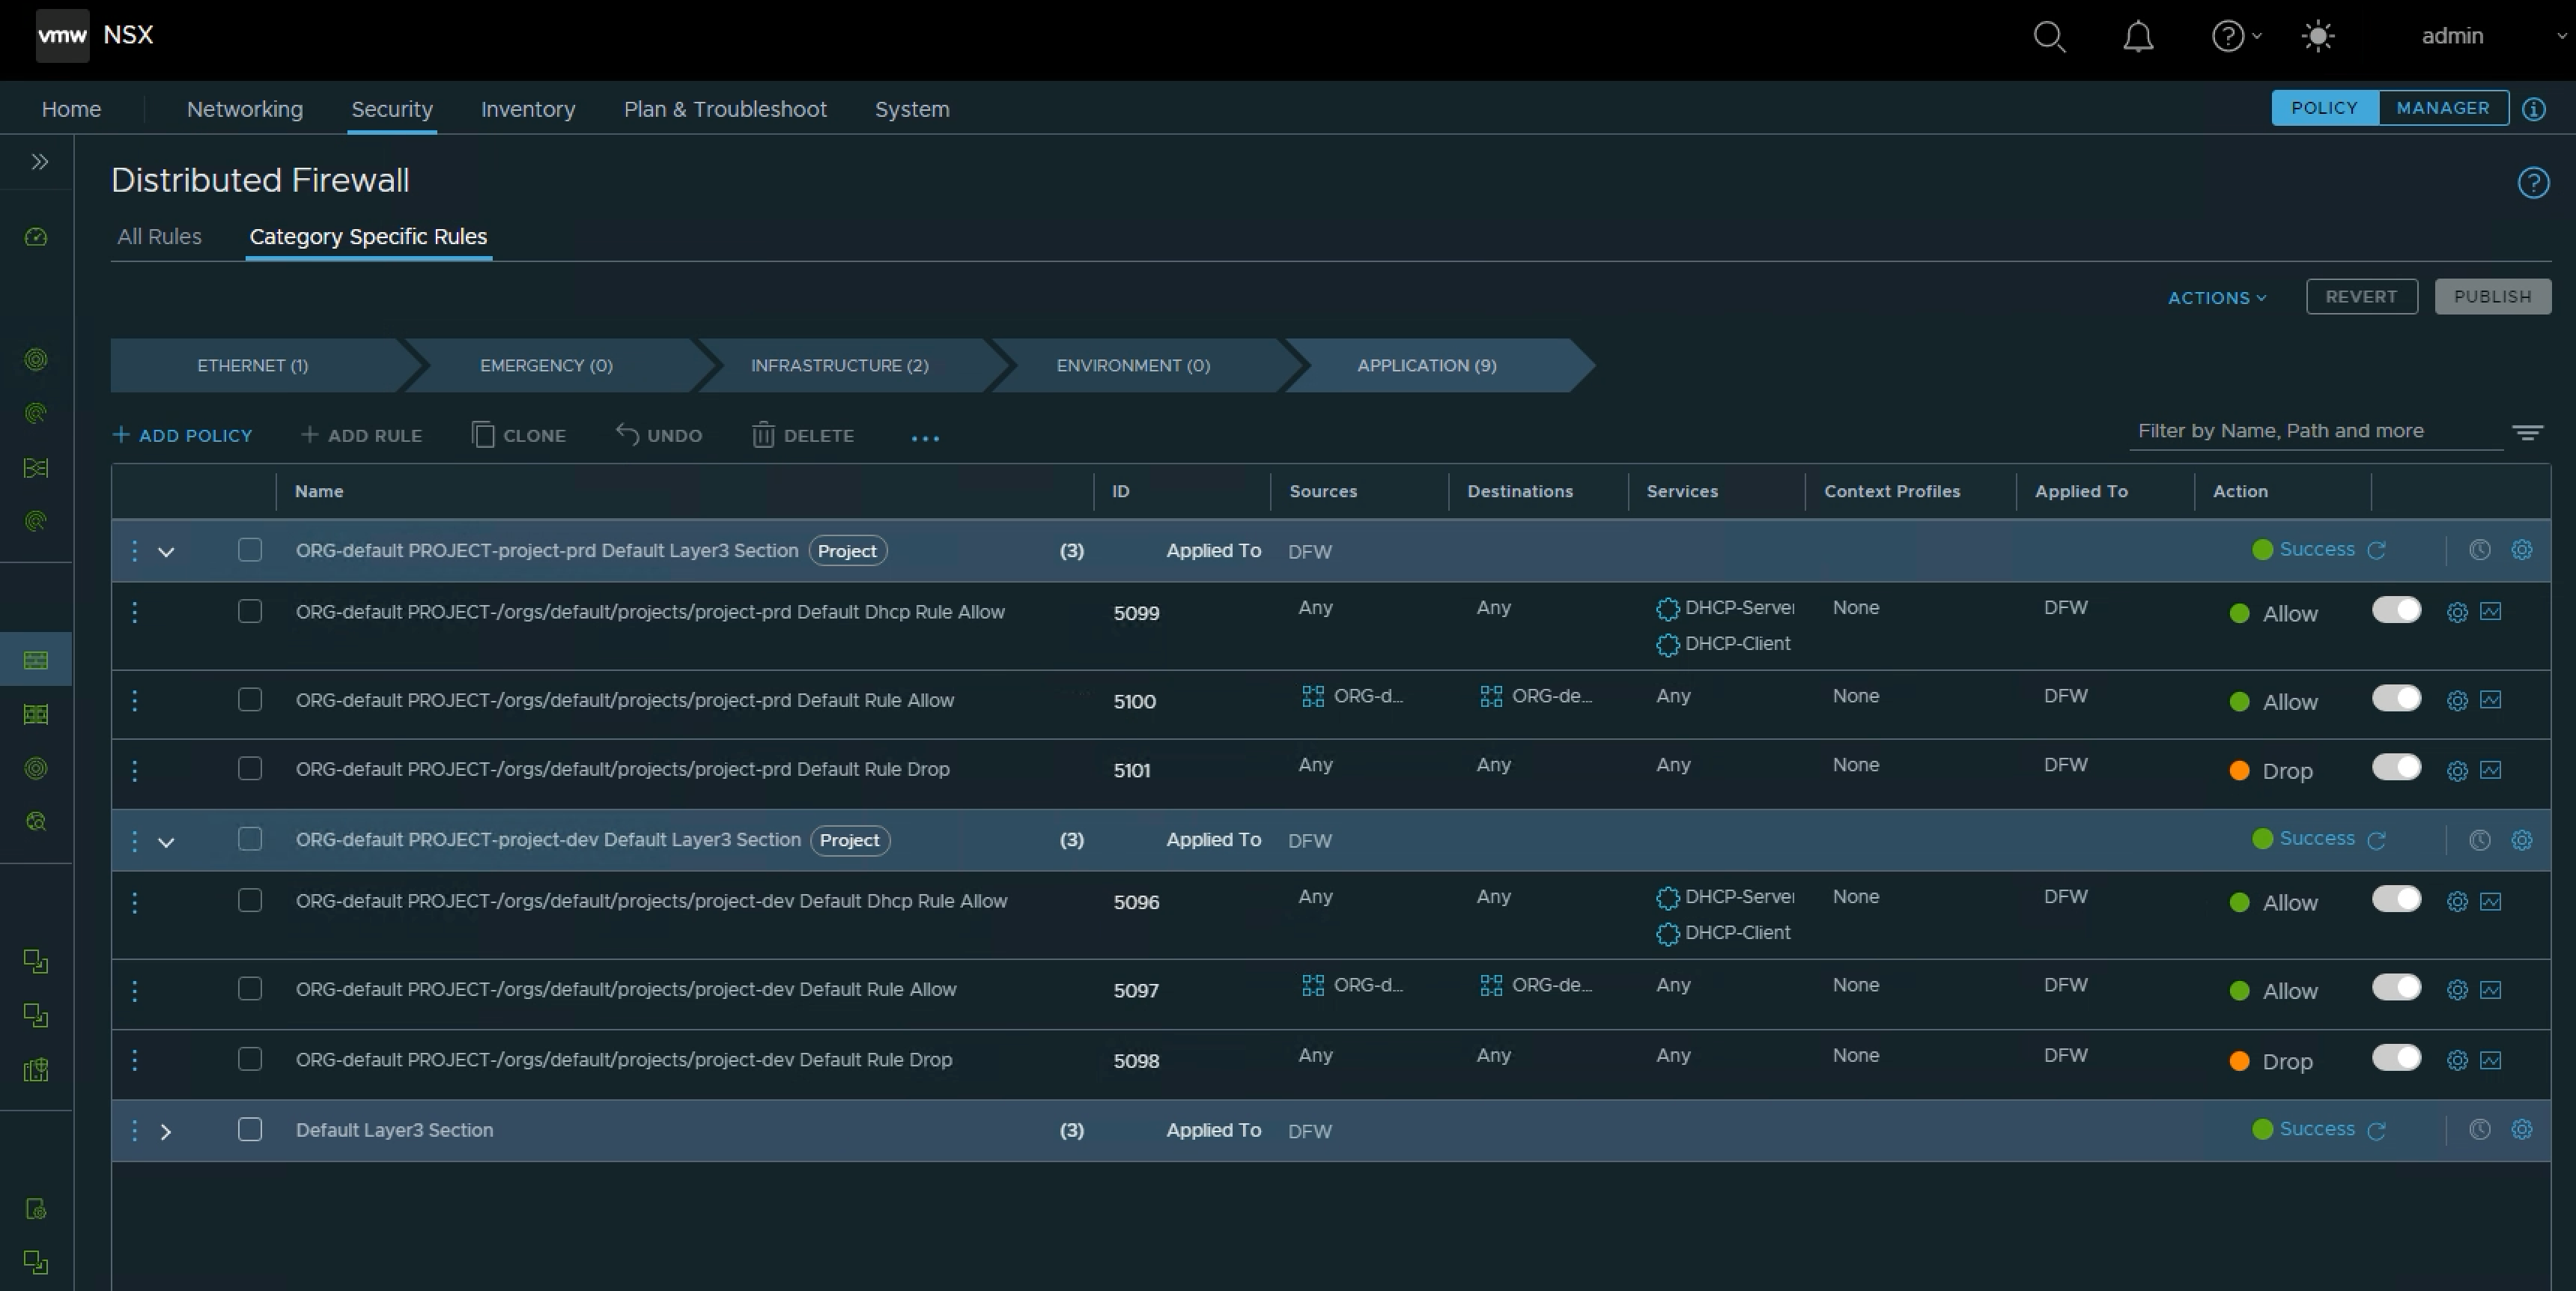
After the Projects are created, we can browse the NSX Manager UI. There are two Groups created. These default groups represent the Projects themselves. The NSX Manager will add all segments created in the Project to the respective group. The default group helps restrict the scope of the rules to a particular Project.
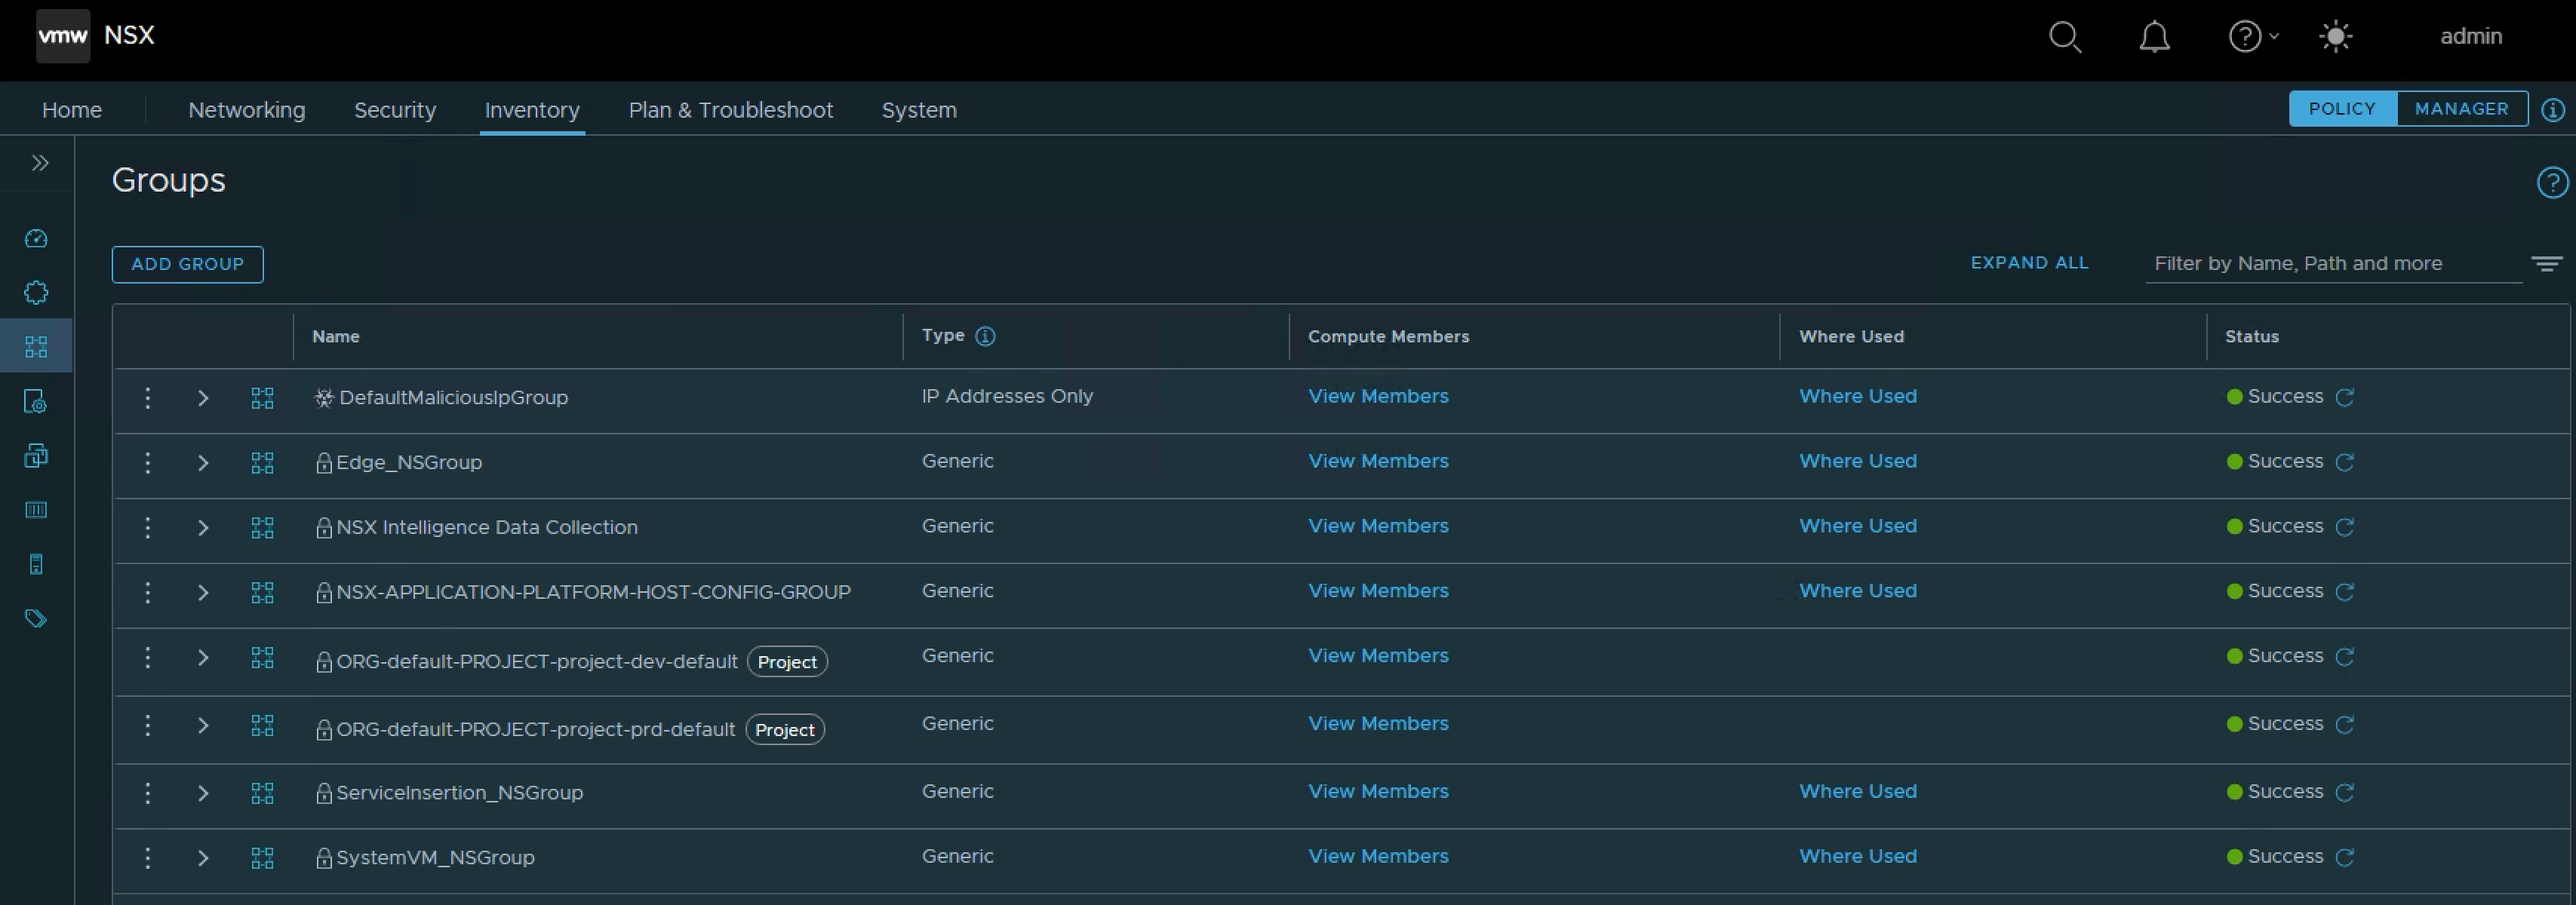
NSX Manager also creates default policies and rules per Project. The default policies provide out-of-the-box isolation between workloads from different Projects.
Projects Admins
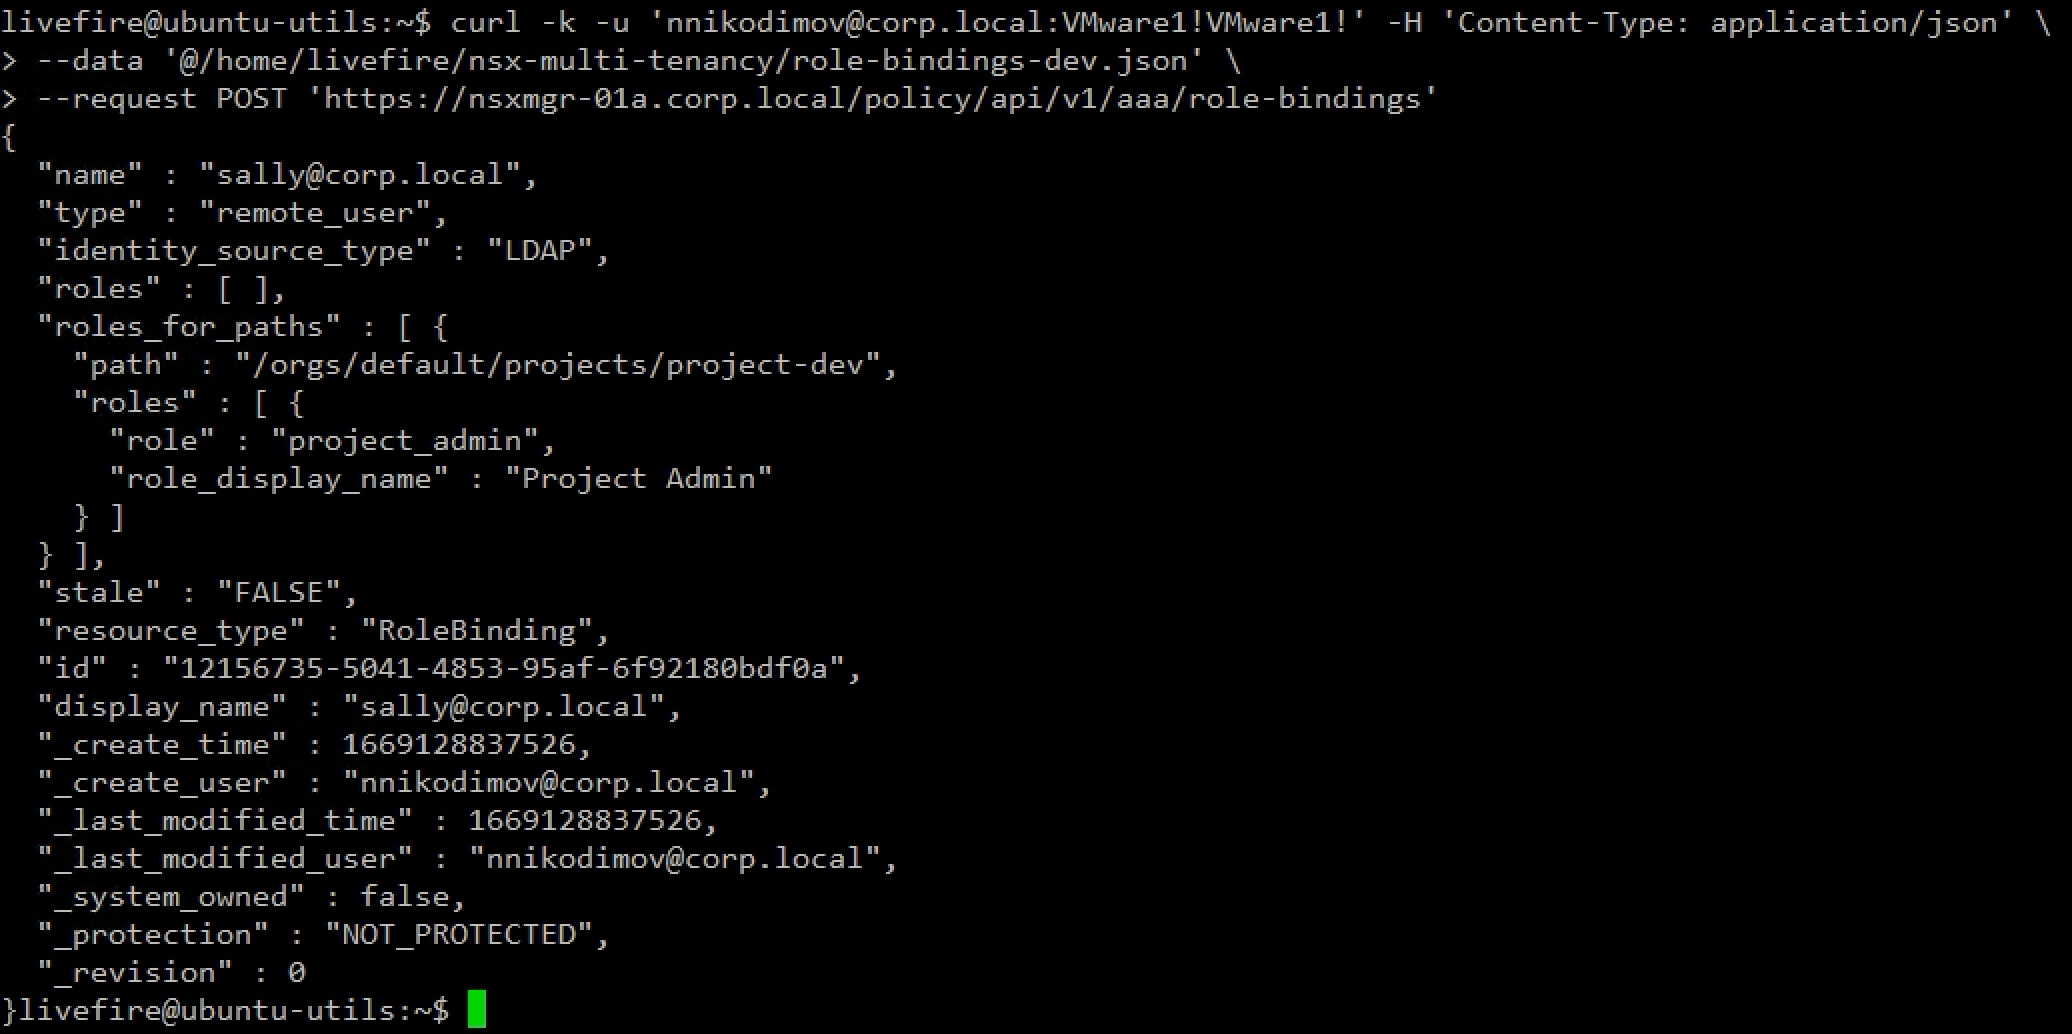
Now that we have the Projects prepared, we must assign Projects Admins to them. I have two LDAM users ready: Sally and Bob. Sally is assigned to be a Project Admin for the Development Project using the following JSON body and API call.
Note that we use the Org Admin user and credentials to run the call.
livefire@ubuntu-utils:~$ cat nsx-multi-tenancy/role-bindings-dev.json
{
    "name":"[email protected]",
    "type": "remote_user",
    "roles_for_paths": [
        {
            "path": "/orgs/default/projects/project-dev",
            "roles": [
                {
                    "role": "project_admin"
                }
            ]
        }
    ],
    "resource_type": "RoleBinding",
    "identity_source_type": "LDAP",
    "read_roles_for_paths": true
}
The API call creates the Sally user and provides Project Admin role bindings.
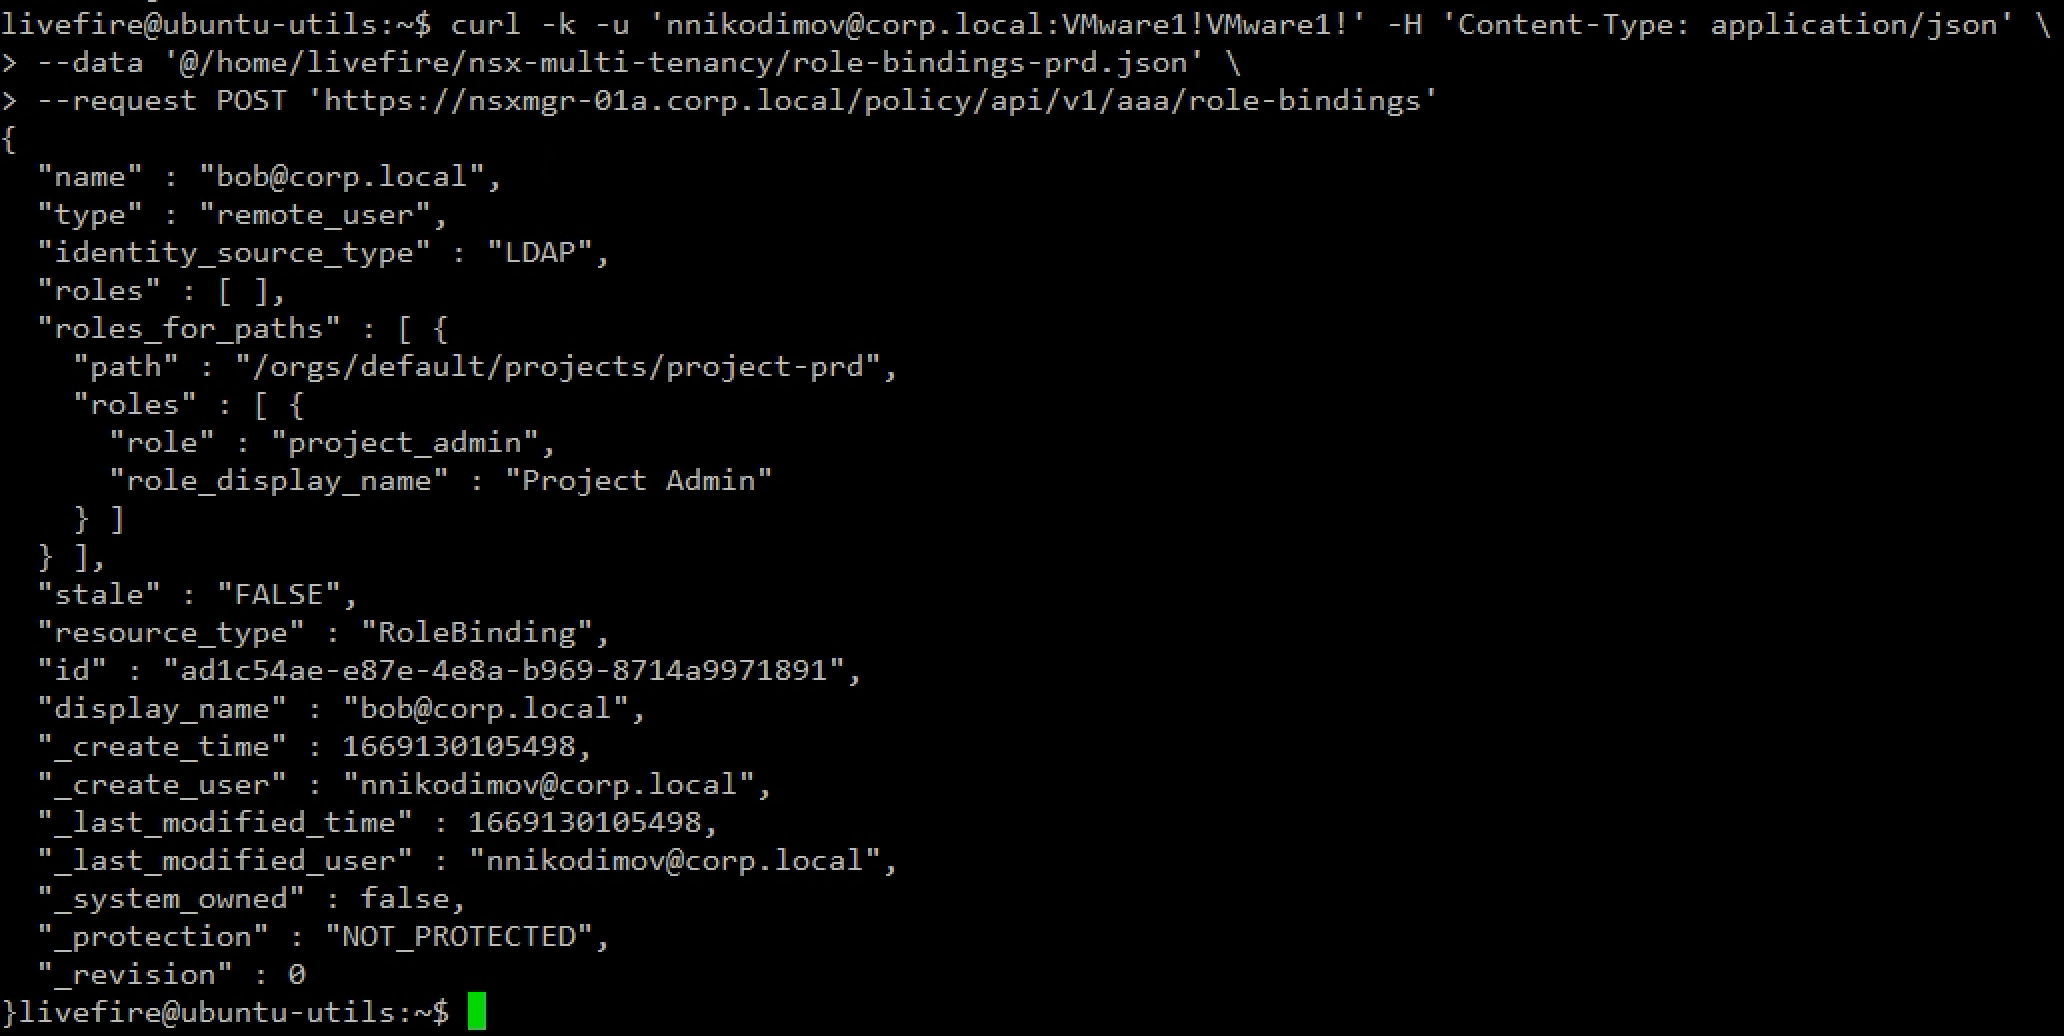
We assign Bob to the Production Project with a project respective API call and JSON body.
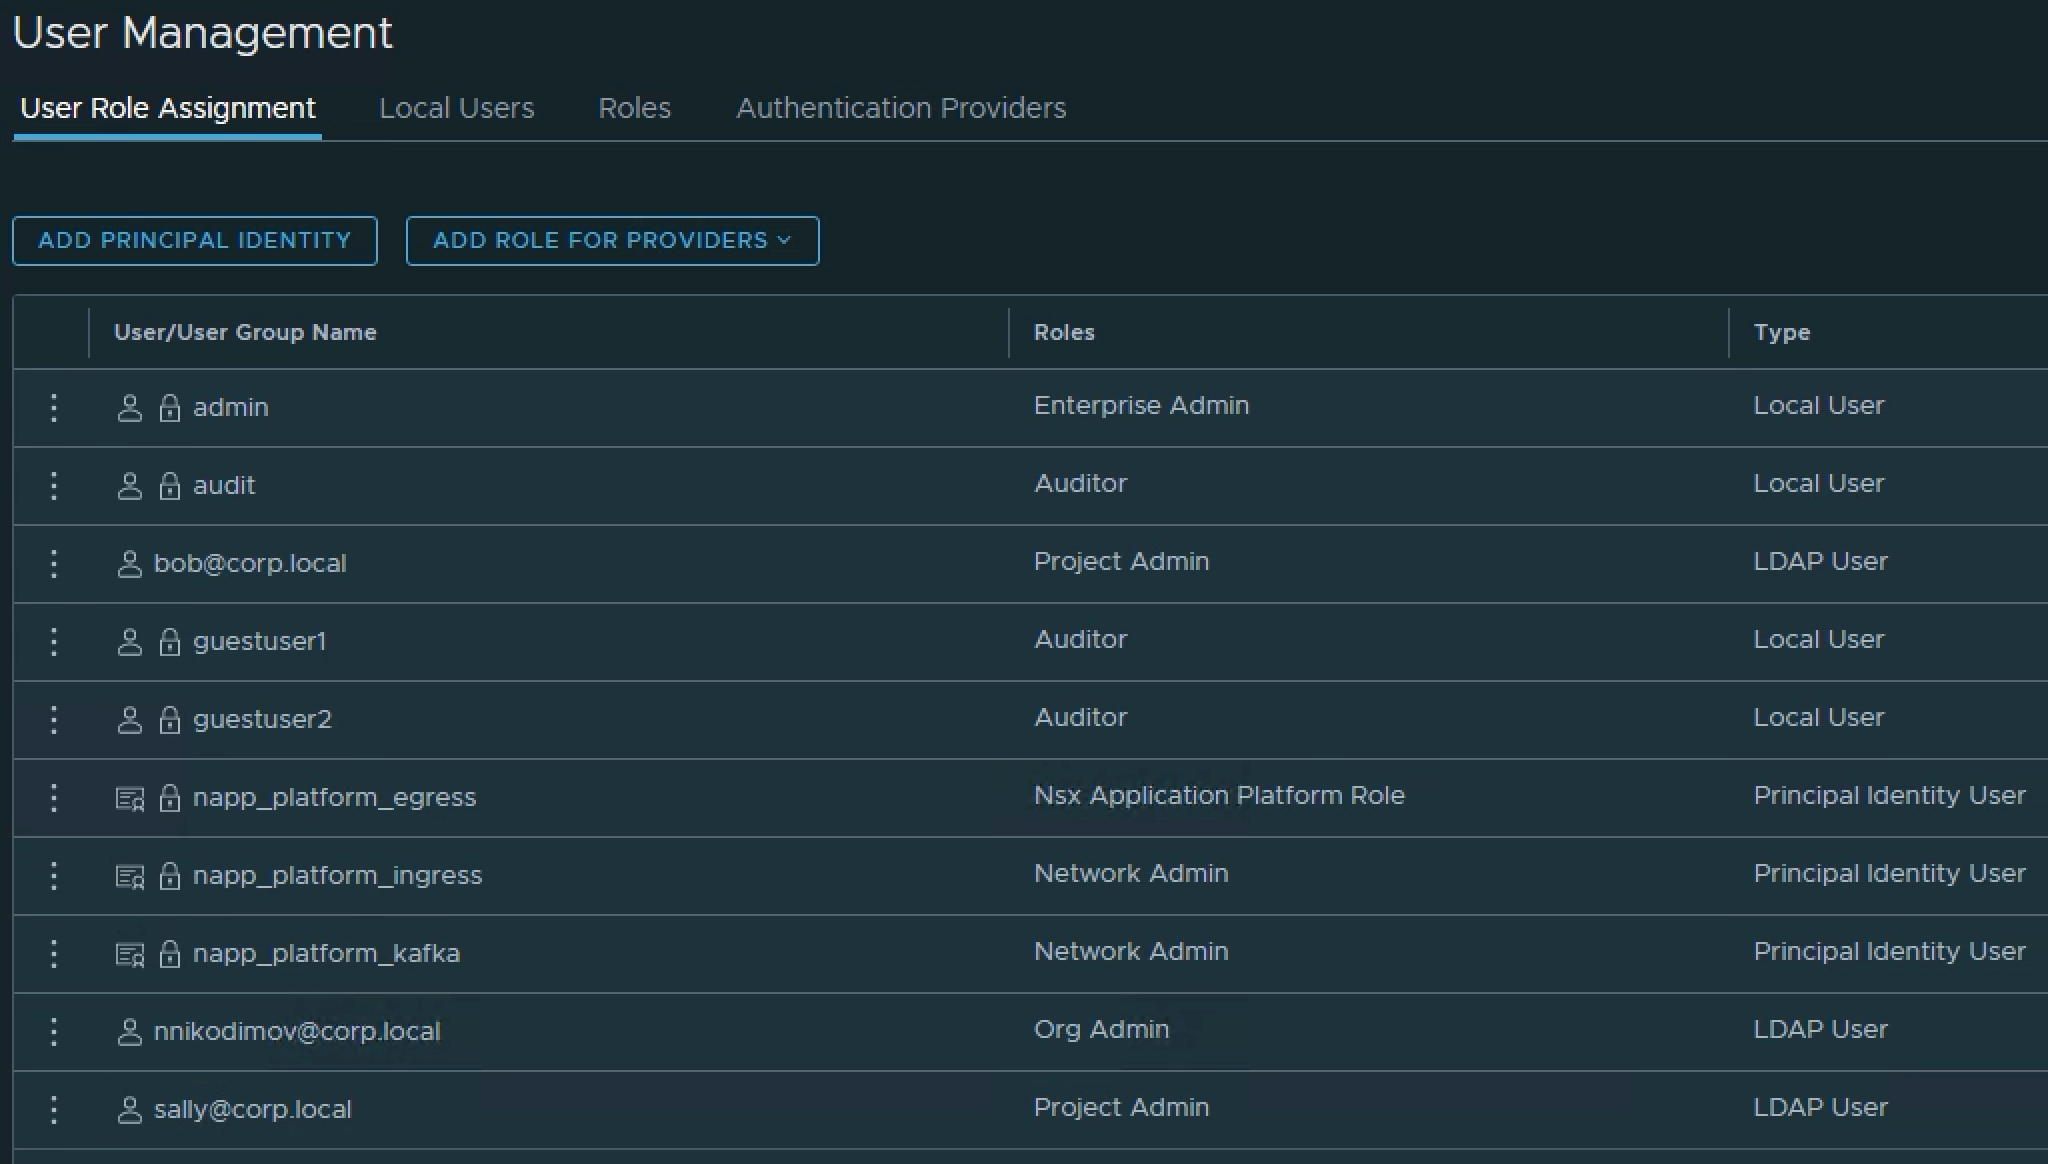
We can quickly check the NSX Manager UI to verify that Sally and Bob are visible in the Use Management. Note the Roles assigned to Sally and Bob are Project Admin.
Project network infrastructure
Now that we have our two Projects and their Admins ready, we can create Project specific network infrastructure. Here I will use an NSX policy API call with a JSON body that creates a Project specific Tier-1 gateway attached to the shared Tier-0 Gateway and two application segments: Web and Db.
Note that the transport_zone_path is missing in the below JSON body for the Segments. This is because only the default overlay transport zone is currently supported.
livefire@ubuntu-utils:~$ cat nsx-multi-tenancy/project-dev-2tier-app.json
{
  "resource_type": "Infra",
  "children": [
    {
      "resource_type": "ChildTier1",
      "marked_for_delete": false,
      "Tier1": {
        "resource_type": "Tier1",
        "id": "dev-t1-gateway",
        "display_name": "dev-t1-gateway",
        "tier0_path":"/infra/tier-0s/t0-gateway",
        "children": [
          {
           "resource_type":"ChildLocaleServices",
           "LocaleServices":{
               "resource_type":"LocaleServices",
               "id":  "default",
                "edge_cluster_path": "/infra/sites/default/enforcement-points/default/edge-clusters/46d44a29-38cd-4495-ac83-a144c142fe00"
                }
        },
          {
            "resource_type": "ChildSegment",
            "Segment": {
              "resource_type": "Segment",
              "id": "dev-web",
              "display_name": "dev-web",
              "subnets": [
                {
                  "gateway_address": "172.16.10.1/24"
                }
              ]
            }
          },
          {
            "resource_type": "ChildSegment",
            "Segment": {
              "resource_type": "Segment",
              "id": "dev-db",
              "display_name": "dev-db",
              "subnets": [
                {
                  "gateway_address": "172.16.20.1/24"
                }
              ]
            }
          }
       ]
      }
    }
  ]
}
The VMware NSX multi-tenancy model allows the assignment of existing (Network Admin, Network Operator, Security Admin, and Security Operator) roles to a specific project by providing the Project path.
Because we are a bit lazy and this is just a test, let’s run the API call to create the infra using the Project Admin role.

Simply for a test, let’s see what will happen if Sally tries to create logical network infra in the Production Project. We receive a message the User is not authorized.
Nice, this is what we expected.

Now let’s use user Bob to create the Production network infrastructure. This time the API call is successful.

The NSX Manager UI shows the Projects’ related network infrastructure – Tier-1 Gateways …

and Segments.
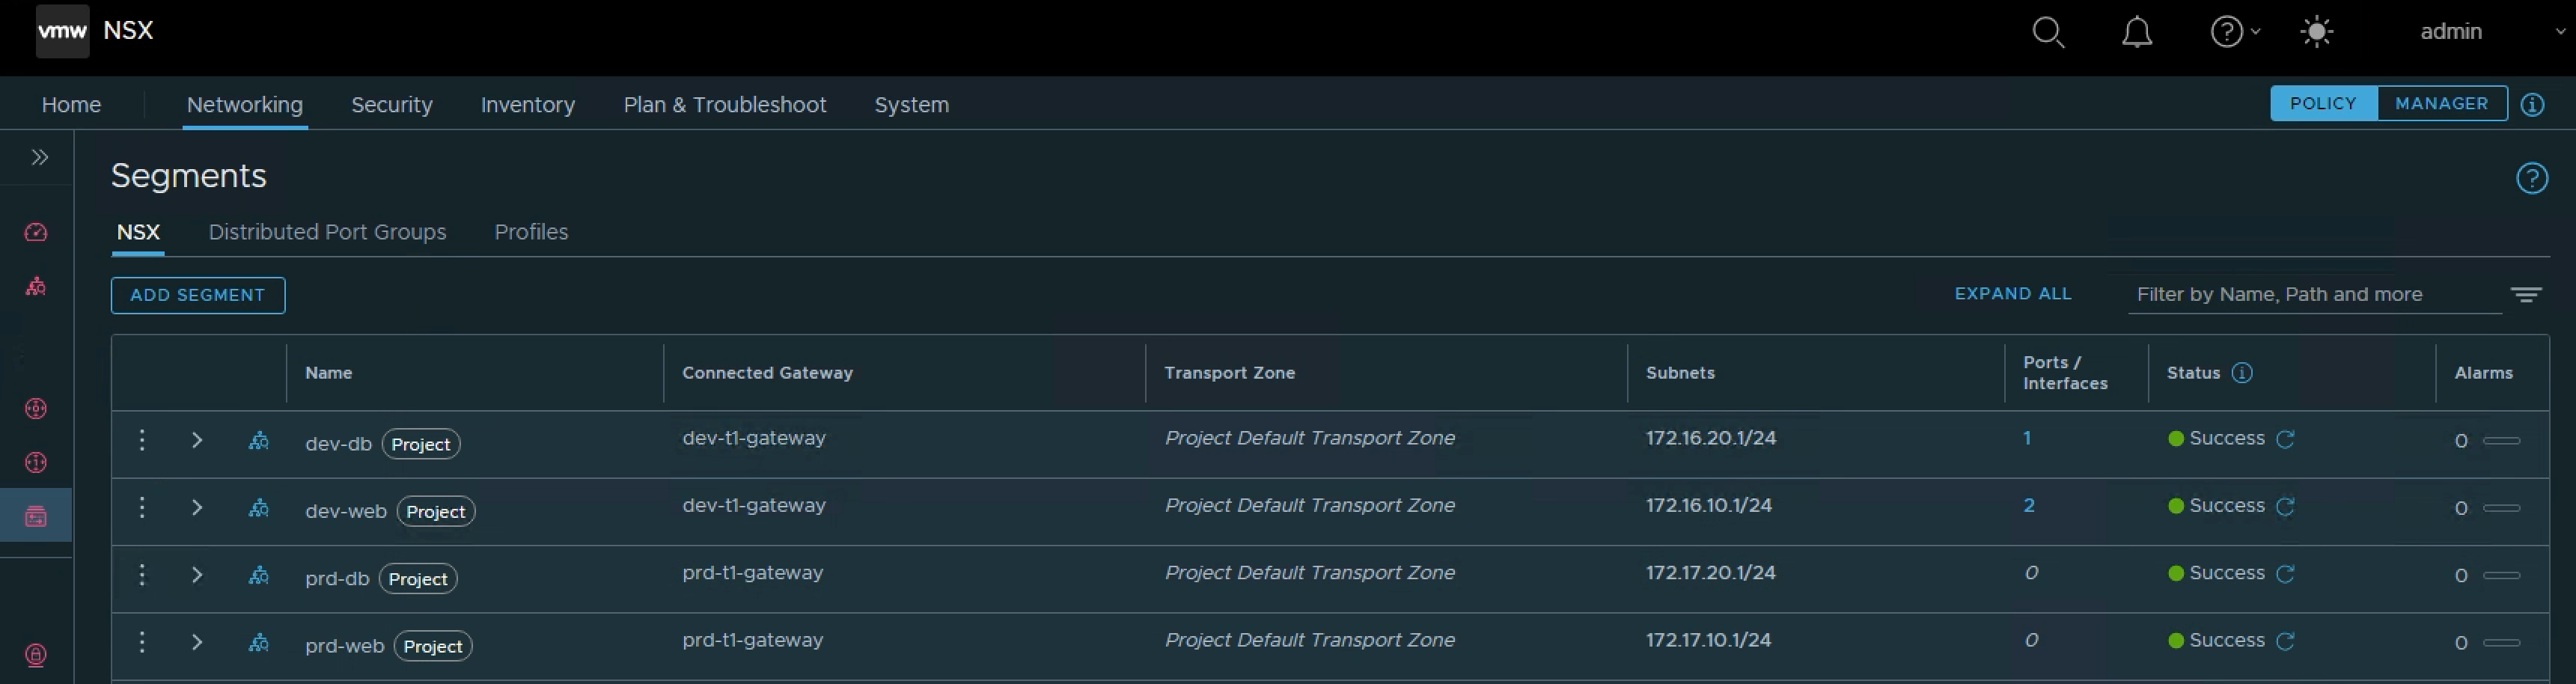
This blog reviewed the VMware NSX (4.0.1.1) multi-tenancy model, some essential concepts, and how we can create Projects and project-specific logical network infrastructure.
As this post has already become too long, in the next couple of weeks, I plan to write a 2nd part to discover more about the Security aspect of NSX multi-tenancy.
Special credit to Luca Camarda and his excellent VMware internal ToI session.


Nikodim has broad experience in a number of technology areas including Cisco, Checkpoint, HPN, Juniper, Fortinet, F5, VMware, Microsoft and Linux. He is Certified Cisco Systems Instructor and holds CCIE Security.
His current focus includes large-scale data centers and cloud deployments, software defined networking (SDN) and data centers (SDDC), and network function virtualization (NFV).
Pingback: VMware NSX Multi-Tenancy – Part 2 – VMware