A Guide to Livefire Registration
All Livefire events are by invitation only. To be invited to an upcoming session, please engage with your respective regional Technical Enablement Manager or Partner Business Manager. All other inquiries please email [email protected].
This guide will take you step by step through the registration process after you have received an invitation.
Step 1
Use the registration link found in the body of the Livefire course invitation you received (Figure 1). Please note the registration link is different for Internal students and Partner students, click on the applicable link.
- Internal students will need to be logged into Okta.
- Partner students will be required to have a Broadcom account to register. If you do not have an account, please skip to Step 3.
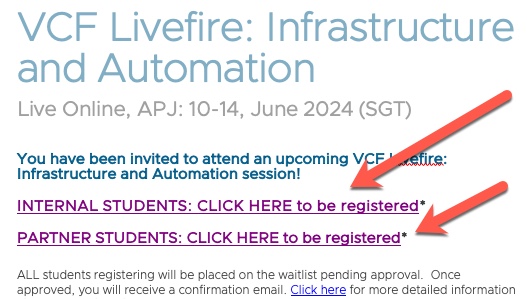
Figure 1 – Livefire Invitation
Step 2
Once logged in, your Learning@Broadcom window should look like this (Figure 2). Please click on the “Add to Waitlist” button displayed in the bottom right window as show in Figure 2.
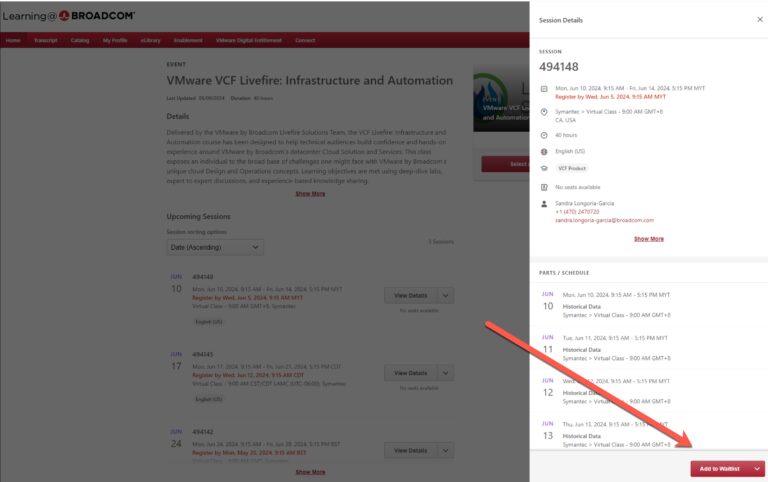
Figure 2 – Broadcom Learning Session Details
While waitlisted, the session will appear in your transcript with the Status: Waitlisted as shown below (Figure 2.a.).
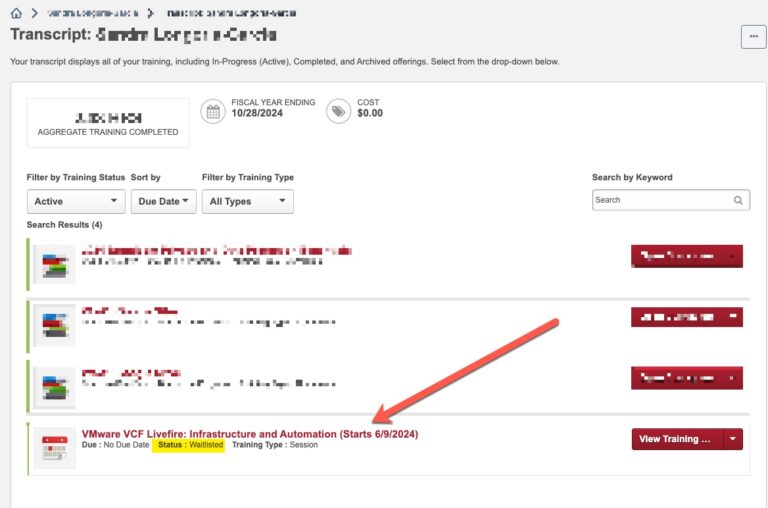
Figure 2.a. – Broadcom Learning Transcript
When seat availability has been determined and your registration approved you will receive a confirmation email as shown below. (Figure 2.b.)
More details to join and access content will be delivered via email separately the week before the session start date.
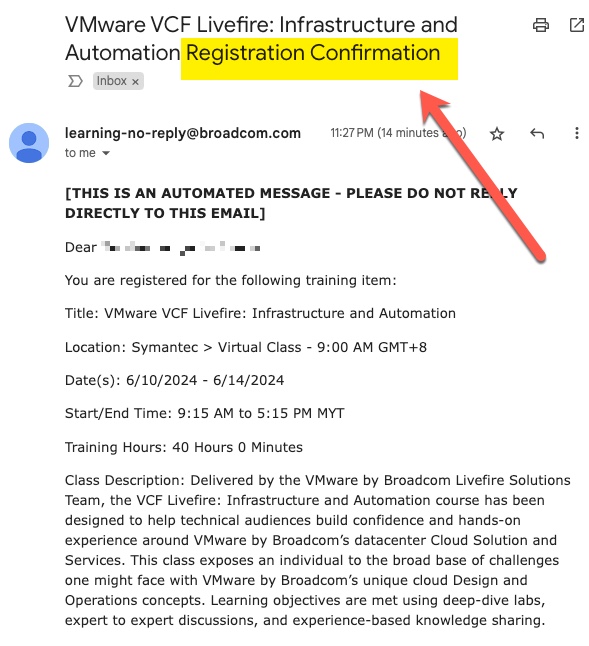
Figure 2.b. – Broadcom Learning Confirmation Email
Partner Students: Step 3
This step is for Partners who need to create a new account. Partners with active myLearn accounts were migrated to Broadcom Learning and your credentials should be the same.
After clicking the registration link from the invitation you received, you will see the Broadcom Customer Sign-In page, as shown below. Click on “Need help signing in?” to expand the selections and click on “Register Link.” (Figure 3)

Figure 3 – Broadcom Customer Sign-In
Enter your email address, and the code sent to that email address, for verification. Please note, the email you create your account with will also be the one used for session registration, all communications and delivery tool access. (Figure 3.b. & 3.c.)
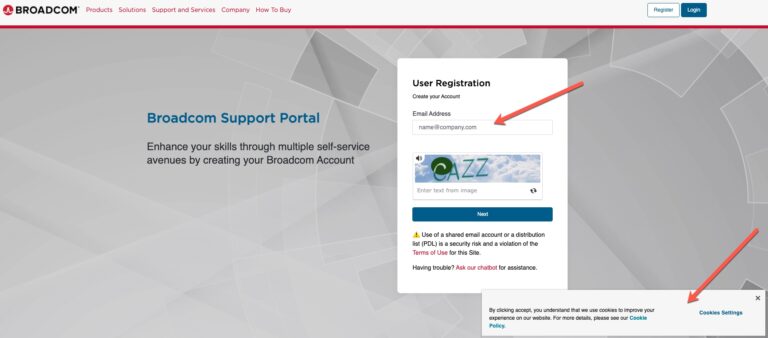
Figure 3.b. – Broadcom User Registration
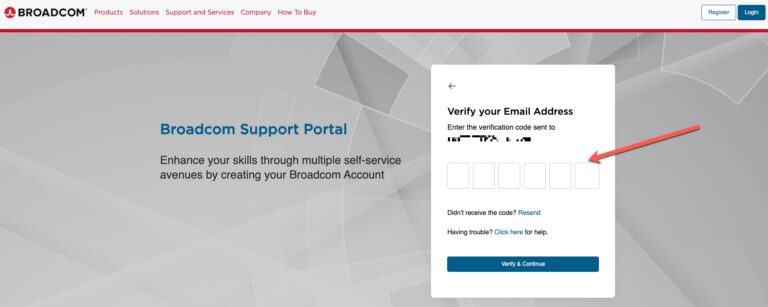
Figure 3.c. – Broadcom email verification
Enter your details, accept the terms of use to finish creating your account. (Figure 3.d.)
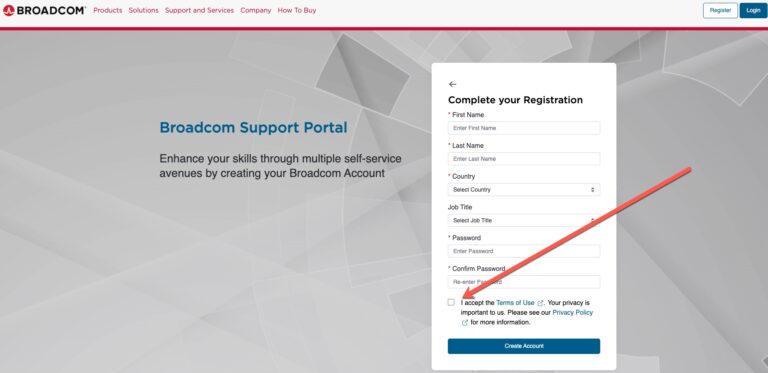
Figure 3.d. – Broadcom Complete your Registration
Your account creation is complete. It is recommended but not required to build your profile for a more tailored learning experience. (Figure 3.e.)
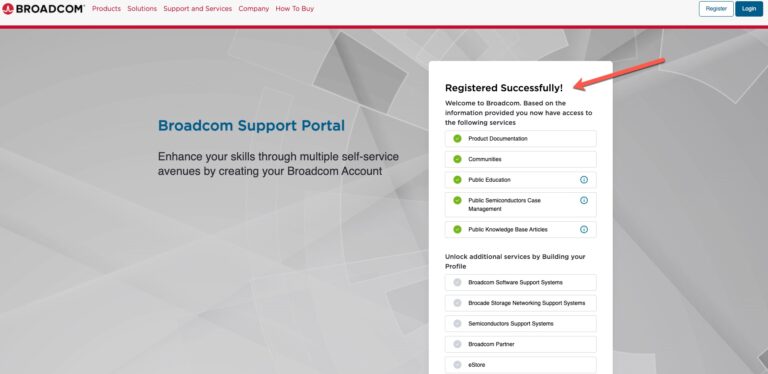
Figure 3.e. – Broadcom Registration Success and Profile Build
Return to Step 2