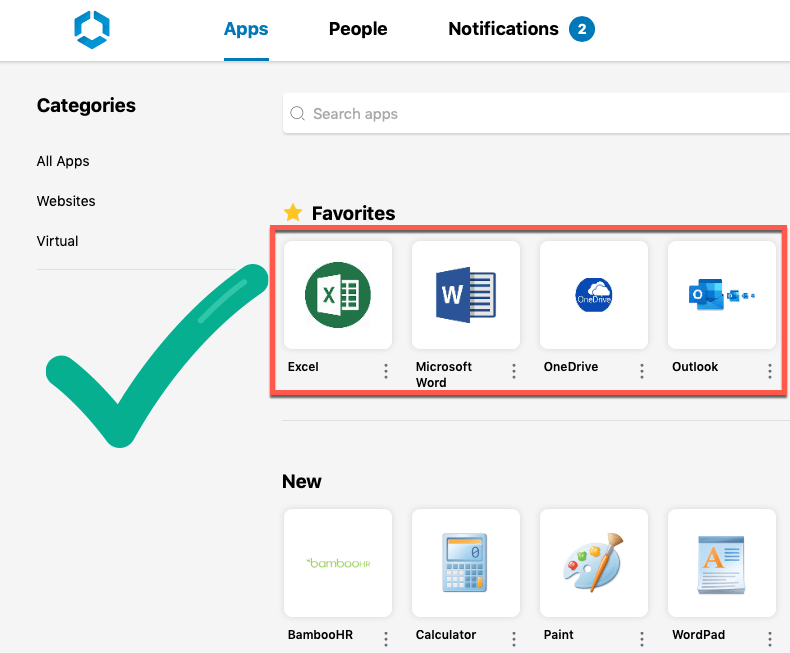
As part of this years Advanced Integration Livefire we have written a lab on adding Azure Microservice (specifically Office Application) as web links into the WorkspaceONE portal. Admins can leverage deep-links to direct users into specific microservices for example Word, Excel, and Outlook. This greatly improves the user experience in consuming Office applications. Instead of landing on the home page of O365 where each application is displayed, the user can jump into the specific MS application directly from their WorkspaceONE Catalog.

URL Structure for WS-FED and OAuth2
To get started we will need to understand which sign-in protocol is used for our authentication as this will determine the format of the URL. Azure mainly deals with WS-FED and occasionally with OAuth2 as in the Outlook example below.
Here the Structure of WS-FED URL[1]–

Word
https://login.microsoftonline.com/login.srf?wa=wsignin1.0&whr= domain.mycompany.com &wreply=https://office.live.com/start/Word.aspx?auth=2
OneDrive
https://login.microsoftonline.com/login.srf?wa=wsignin1.0&whr= domain.mycompany.com &wreply=https://domain-my.sharepoint.com
Excel
https://login.microsoftonline.com/login.srf?wa=wsignin1.0&whr= domain.mycompany.com &wreply=https://www.office.com/launch/excel?auth=2&home=1
PowerPoint
https://login.microsoftonline.com/login.srf?wa=wsignin1.0&whr=domain.mycompany.com&wreply=https://www.office.com/launch/powerpoint?auth=2
OAuth URL Structure [3]
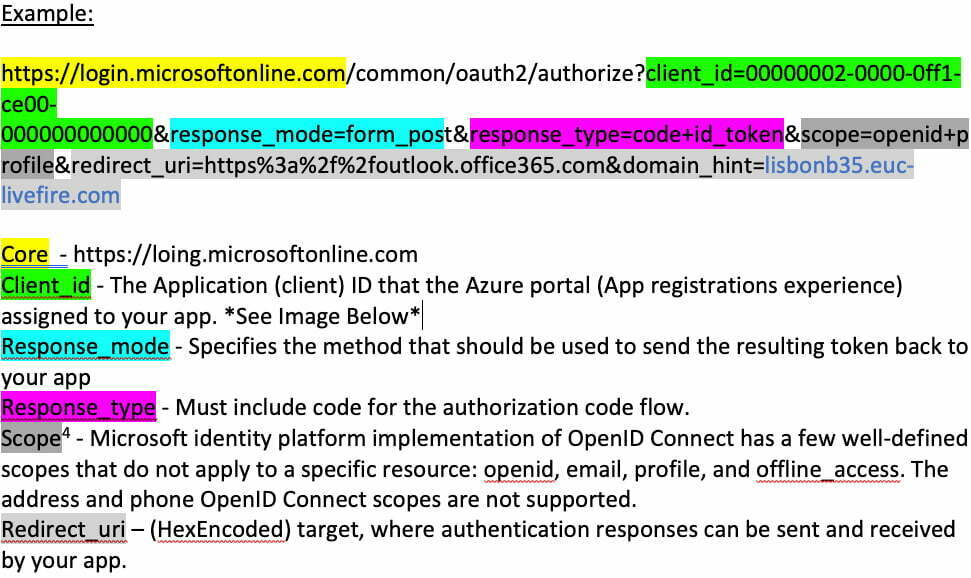
Outlook
https://login.microsoftonline.com/common/oauth2/authorize?client_id=00000002-0000-0ff1-ce00-000000000000&response_mode=form_post&response_type=code+id_token&scope=openid+profile&redirect_uri=https%3a%2f%2foutlook.office365.com&domain_hint=company.mydomain.com
Adding DeepLinks to VMware WorkspaceOne Access
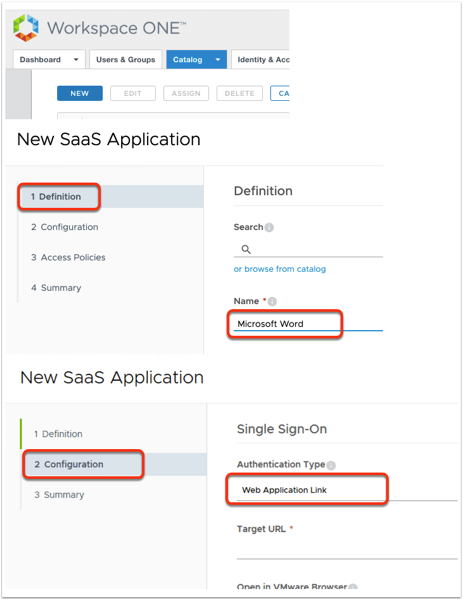
Log in to your to your VMware Identity Manager Console as Admin and select the Catalog tab > Web Apps
- Select NEW
- In the New SaaS Application window under Name type Microsoft Word (the name of the MS application)
- Under Icon, click on browse, search icon (example: Word.png) and select Open. At the bottom right select NEXT
- On Configuration in the Single Sign-On section under Authentication type select the drop down and then select Web Application Link
- Then fill the in the Target URL field with the WS-Fed deeplink specific to your application.
- Select NEXT > then Click SAVE and ASSIGN at the bottom of the page and assign to the desired user or user groups.
Would love to hear your comments below if this is helpful or needs more detail.
Special thanks to @Sascha Warno and @Camillo Lotero for review and feedback.
[1] https://blogs.technet.microsoft.com/askpfeplat/2014/11/02/adfs-deep-dive-comparing-ws-fed-saml-and-oauth/
[2] https://medium.com/@robert.broeckelmann/understanding-ws-federation-passive-protocol-3f9dc2175b4f
[3] https://docs.microsoft.com/en-us/azure/active-directory/develop/v2-oauth2-auth-code-flow
[4] https://docs.microsoft.com/en-us/azure/active-directory/develop/v2-permissions-and-consent

